Showing posts with label Black Gold Saw. Show all posts

Tuesday, June 25, 2013

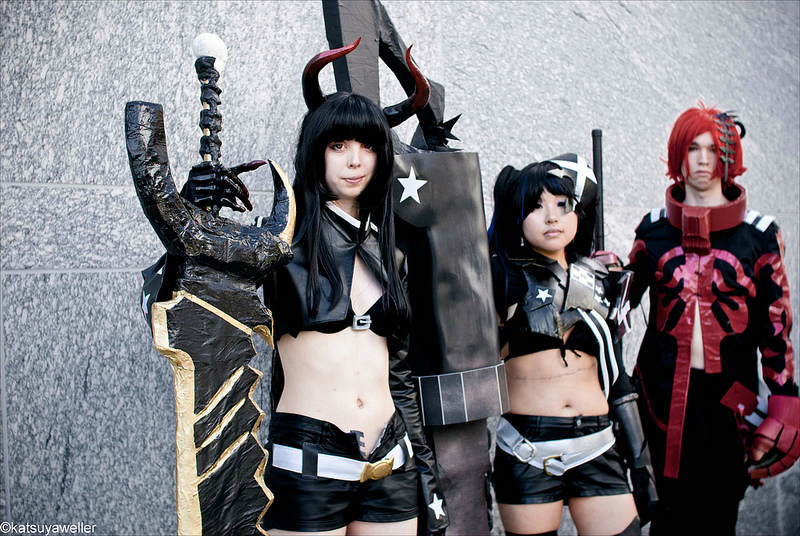
Black Rock Shooter Photoshoot - Katsuya Weller

I'm back with what I believe is the final leftover from the backlog of last year- The Black Rock Shooter photoshoot from the talented Katsuya Weller!  We dragged her all the way to the North Carolina Museum of Art for part of this shoot, and we thank her profusely for putting up with all of our "getting lost while driving" and "having our costumes melt and/or fall apart" nonsense.
Yes, bask in the glory of the giant circles
Stuart's model close-up
Dramatic gaze into the distance
Then we trekked back to the convention center so we could dramatically lay down on the floor.
Careful not to get stepped on


Because I just love my sword SO MUCH
Group shot!
To see all of these pictures in their high-resolution glory, here is Katsuya's AZ 2012 photoshoot set on Flickr.

~Kathryn

Wednesday, May 29, 2013

Black Gold Saw: Sword

So I realize this post has been a long time in coming (give or take a year or so), but I am finally getting around to the sword construction post for Black Gold Saw!

(pretending that I didn't completely forget about this)


My sword is quite similar to Stuart's - we went to Home Depot and bought a giant piece of that pink 2" thick insulation foam together and got them to cut it in half in the store (meanwhile having to awkwardly explain just why we needed almost six feet of insulation foam when we were clearly not making home repairs).

Unfortunately, Black Gold Saw's sword (what a tongue twister) features an entire edge that is serrated, so I had to measure and sketch out every zig and zag along the way.  
The top bit ended up being nixed and enlarged later
 And then came the fun part.  Carving.  Carving carving carving carving.  Expect to spend many many mind-numbing hours on this part, and be careful - X-Acto knives are sharp.  (You might think this obvious, but when you are trying to distract yourself from the tedium by watching bad television, your hand might accidentally slip).  My poor apartment had more pink insulation foam on the floor than actual carpet by the time I was done with this.

In order to get the hilt to fit snugly into the sword, I cut a rectangular strip down the middle of the sword so that I could insert the PVC pipe.  I remade the top part of the sword out of leftover foam (made it larger), so I just cut a hole through that and stuck the PVC pipe all the way through.
Just so.
Then came the joys of expandable foam, and here comes the warning: DO NOT GET THIS ON YOUR HANDS, CLOTHES, FLOOR, OR ANYTHING THAT YOU ARE REMOTELY ATTACHED TO.  Wear gloves, and then prepare to never be able to use them again.
Terrible quality picture is terrible
And once it is dry (you should leave it at least overnight- poke it with a stick to be sure it is hardened), you can shave off the extra foam.  However, here is something I was not aware of that caused a few problems- when expandable foam is cut, it actually shrinks noticeably in volume.  Do not shave the foam completely flat against the sword - you will end up with this weird warped indentation down the middle of the sword that I have (and was unable to mask).  Once that is done, cover the entire thing in masking tape.
Add paper mache, and voila!
Finally, spray paint/acrylic paint it until it looks the way you want it to, then seal it with Mod Podge (but get matte, not glossy...I accidentally used glossy and my sword was much shinier than it needed to be).

The handle was made with Delight air-dry paperclay , and I sculpted the skull on top with stone clay.  

The finished product:


Stay tuned for another sword tutorial!

~Kathryn

Sunday, July 15, 2012

Black Rock Shooter Photoshoot, Part 2- Black Gold Saw

After a week of blerg (that's actually the technical term), I'm finally getting around to posting my pictures from our Black Rock Shooter group cosplay.  So without further ado, here's the second set of photos from the photoshoot with the wonderful Bryan Regan!

You know how much fun it was getting up onto that platform?  Not.
Model pose GO

That sword is ridiculously difficult to hold up with one hand.  That is my intense concentration face.

Why hello wig, after a day of conning you don't look so good.   Creepy factory makes up for it though.
Dramatically stare into the distance.  This is an important skill.

I think I may have been singing here. 
Totally not slipping on the gravel.  Definitely an intentional pose.  Definitely.

You're damn RIGHT there's no trespassing.

Ridiculously well-timed walking picture.

AWWW YEAH, cue dramatic wind blowing my hair.  And, you know.  Cars.

Batter up!  Swing batter batter SWING 
>__<
And just for fun...

I think you're doing it wrong.

Herp derp.  
Guitar sword?  Yes please.
More group shots and MZMA pictures to come!

~Kathryn

Tuesday, July 3, 2012

Contacts Review, Ahoy!

So I thought that I would do a brief review of the contacts I used (or in one case, tried to use) for the Minene Uryuu and Black Gold Saw cosplays.  Since I have green eyes, sometimes it's difficult to know for sure how contacts will look on me, so I feel like these kinds of reviews come in handy on occasion.

Green eyes are green.  I swear that I never used to take these silly mirror pictures before this blog started...

Both of these sets of contacts were ordered from Pinky Paradise, pretty much my go-to place for colored contacts.  In addition, as I can see approximately three inches in front of my face without corrective lenses, both of these contacts come with strong prescriptions.

Black Gold Saw: Vassen Ruby Red 

EYEBROWS, WHY U NO MATCH WIG HAIR
You can see my natural eye color around the center of the pupil, but it actually looks pretty interesting.  You can't tell from this picture, but they actually do look a bit more red than they appear here.  They were very comfortable - I wore them for at least 10 hours (although you are definitely not supposed to do that), and I felt no discomfort whatsoever.  It felt like I was just wearing my normal contacts.

Minene Uryuu: E.O.S. Dolly Eye Violet 

...Well.  I'm afraid there will be no pictures of myself in these contacts.  I'm not sure what was wrong with them, but I could not for the life of me get them in my eyes without experiencing an intense burning that preceded immediate removal, on pain of death.  I had hoped it was a fluke, but I tried to put the contacts in three times that day, and each time I encountered the burning fire of a thousand suns...in my eyeballs.  

  Now imagine this in your eyes.  This horrible color that makes your eyes burn?  Yes.  Just like that.  Times a thousand.
I contacted Pinky Paradise about this, and they indicated that in order to give a refund or replacement that they would need pictures of the contacts and the bottles they came in with the expiration date visible.  As I had never had a problem with Pinky Paradise lenses before, I hadn't made a habit of taking pictures before opening the contacts, so I was unable to get a refund.  In the future I will remember to take lots of pictures, and I would recommend that others do the same.  Regardless, I have gotten many great contacts from Pinky Paradise and have never had any problems before, so I will write this off as a fluke.  

So what have I learned?  
1. Always takes pictures of the contacts you receive before you open them.  
2. Don't put things in your eyes that do not belong there.  Your eyes will tell you.  Vehemently.  
3. The bathrooms at Animazement have terrible lighting for re-applying makeup after your eyes have been watering.  Bring a compact mirror.  

And just because I can:

Well put.
~Kathryn

Saturday, June 9, 2012

Post-con Posts! Black Gold Saw - Jacket


If you couldn't tell by the sudden deluge of updates, we're baaaaack and ready to finish up our cosplay tutorials from this con.  Or, in my case, to sarcasm at you some more.

And here I was thinking that the half jacket was going to be the hardest part of the costume.  Ha.  Ha ha.  Ha.  If only.
To begin, I started looking around for the right kind of fabric, and I ended up with a type of black pleather that I found on sale at Jo-Ann Fabrics.  I tried to avoid very stretchy fabrics that would probably wreak havoc on any sewing machine (more on that later, I'm afraid).  After digging around in the pattern section, I came up with a cropped jacket that was close to what I was looking for and was relatively simple to make, an important feature for someone as sewing-machine challenged as I seem to be.

 It looks so pink and happy, doesn't it?  Won't look that way for long, I'm afraid.
Minor alterations were made to the collar and front, but most of the changes were made to the length of the sleeves in order to make them come past my knuckles.  Also, sewing on sleeves makes me want to throw things.

Look ma, no sleeves!  
 I was surprised at how (relatively) well the fabric got along with the sewing machine, but alas - it was not meant to be.  At the end of the project (i.e. the ends of the sleeves), the machine decided that enough pleather was enough, a decision heralded by a sound that (I can only imagine) was akin to that of a cat being thrown backwards into a wood chipper.  (...What is wrong with my brain, that that is the first mental image I come up with.) So, the rest was done by hand.  

The white stripes on the upper sleeves and collar were painted, and the stars were made as stickers from a pattern I drew.  As I discovered, drawing perfect stars is not as easy as it sounds.  Not that that sounds particularly easy to begin with.  The collar was held together at my throat by two hook and eye fasteners.

Stars and stripes!  How patriotic.
A word to the wise, though: Experience dictates that, in temperatures upwards of 90° F, pleather and any pleather-like materials tend to...melt.  Spending prolonged amounts of time outside in the summer in the name of awesome photoshoots may lead to said melting.  And pleather is not the most comfortable (or breathable) of materials to begin with.  But it must be said, the jacket (unlike some other parts of my costume cough belt buckle cough) survived the entire convention, and that is all I asked of it.  Overall success!  

More on horns, contacts, and photoshoot pics to come!

~Kathryn

Monday, April 30, 2012

Black Gold Saw- Skeletal Claws Progress

What is this?  An update?  Gasp! Shock!  But since I finally have some time on my hands, I was able to mostly finish the claws for Black★Gold Saw. 

So I started by making a few sketches from the  Black★Gold Saw figma on which I will be basing my costume.

And then I will pose. Just like this. In front of a wind machine.
I was inordinately excited to be making skeletal looking claws, because I have this strange obsession with bones and pseudo-anatomical correctness, so I spent much time carving and shaping them until they resembled elongated human phalanges.  Oh, and if you haven't figured it out yet, I'm kind of weird.

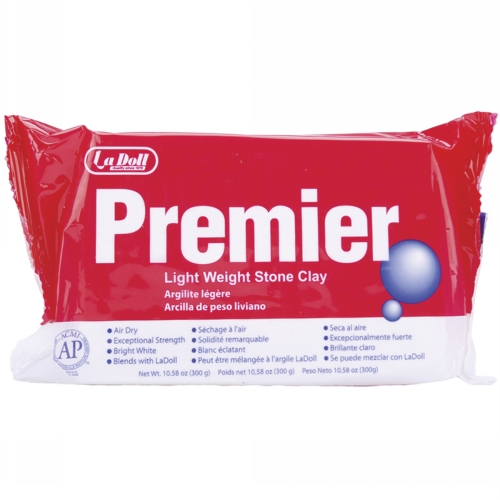
So I started with Premier stone clay by La Doll, and I found that it is very lightweight but also very sturdy.
I have tried to break my prototype claw, but I have yet to succeed without damaging furniture.
It can be found at pretty much any craft store, and while it is a little pricey, you'll find that the small package actually goes a surprisingly long way.  I managed to make all ten claws plus two prototypes and two "oopsies" when I realized that I needed to flatten out the proximal digit so that it would fit on my finger without being too bulky, and I still have a bit left in the package.

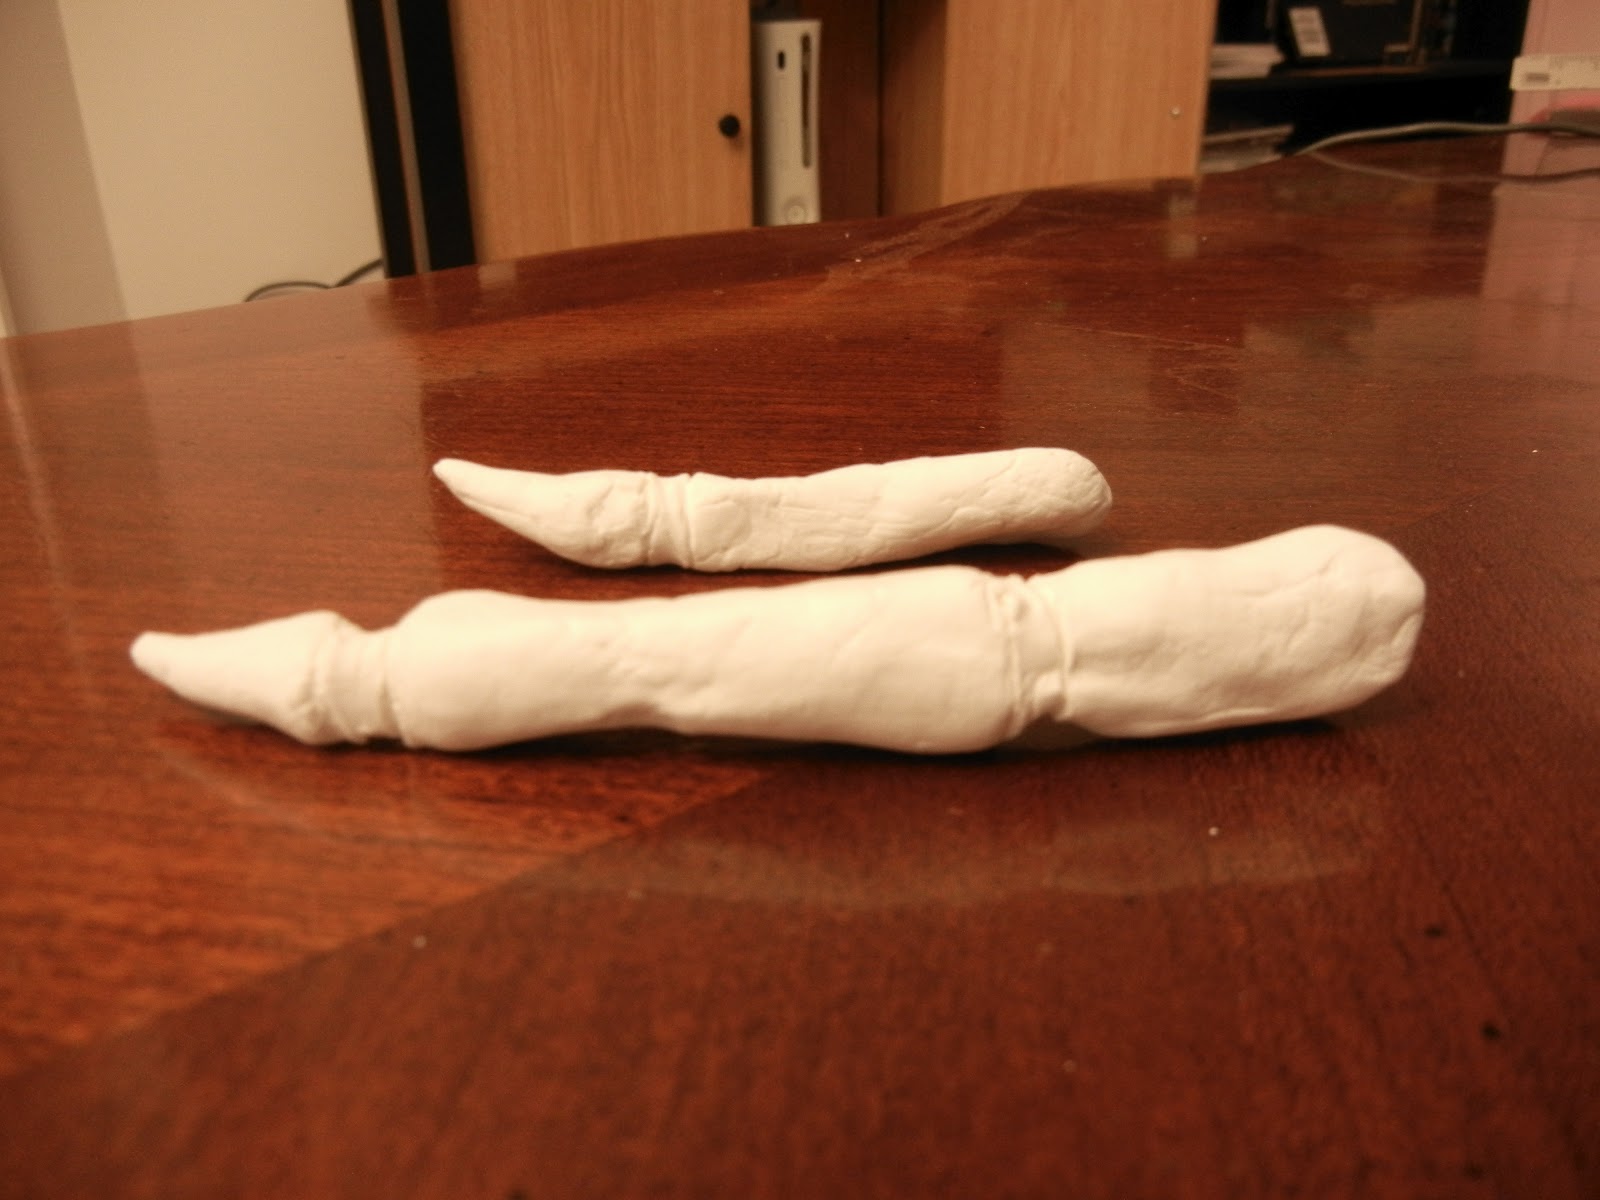
So here are a couple of the claws after they had been carved and let dry for 24 hours.  I think this is a pinky claw and an index finger.

Why hello, Xbox 360, fancy seeing you here
Post paint!

You have no idea how many times I had to retake this picture for it to not come out blurry.  
The claws have been painted with a gradation of red to black.  I'm afraid my camera doesn't really do the colors justice, though.  In order to keep the paint from chipping, I decided to gloss them.  I had bought Sculpey glaze for this express purpose, but after going over one of the claws, it became readily apparent that the paint was cracking, peeling, and bubbling.  So...that idea was definitely out.  The solution?  Clear nail polish.  No cracking or bubbling, and it's cheaper than proper glaze anyway.  Extreme laziness ftw.
Since this may turn into an impromptu anatomy lesson, here is a human hand for your viewing pleasure.
Now there is a reason aside from my own morbid fascination that I have included this lovely anatomical diagram.  I wanted to try and explain where I attached the claws to my own fingers, and this is the best way that I know how.  The claws that I crafted give my hands the impression of having an extra phalanx, increasing length and creepiness.  The claws are attached to my hand at the point between the middle and proximal phalanges, so that I am able to retain most of my mobility and grasping ability.  

I used a satin opera glove that I had lying around (and yes, I actually have several pairs of opera gloves lying around my apartment, thank you very much) as the base for the claw.  Then I used a hot glue gun to attach the claws to the gloves at the beginning of the middle phalanx of my hand.  Of course, this means I was wearing the gloves while gluing things to my hand.  Not quite as painful as I had anticipated, but I'm sure there are easier ways to do it that involve fewer burns. 

And I even have the mobility to use a camera (even if my claws kept photobombing my pictures)
I am also in the process of making some more proximal phalanges and possibly metacarpals to go on top of the gloves to give the appearance of entirely skeletal hands, but that will be updated later. YAY CLAWS.  Time to go freak out the neighbors.

Next up- the perils of sewing pleather. 

~Kathryn

Monday, February 27, 2012

Animazement Cosplay Plans


So our AZ plans for this year have been decided: We're doing group cosplays as characters from Mirai Nikki and Black Rock Shooter (and hopefully signing up for the Masquerade this year, which is exciting).

I had a bit of a change of heart regarding Dead Master. While her scythe is beyond awesome, the rest of her costume (read: her shoes) seemed a bit boring to me, so instead I'll be going as Black★Gold Saw, whose boots are suitably absurd:

Who wears short shorts? We do, apparently...

There is no logical reason why I should be so excited to learn how to make giant weapons. But I really, really am.

Who doesn't want armored thigh high boots, I ask you?

As for Mirai Nikki, I will be cosplaying the militant atheist terrorist who really enjoys blowing things up, Diary Holder #9 - Minene Uryuu.

Why am I always cosplaying the antagonists? I think this says something about me...

Unfortunately I will not have much time to work on the costumes for the next few weeks (curse you, MCAT!), so I can't really get started properly until March 25. Assuming my brain hasn't seeped out of my skull by that point.

But there has been some progress! I have ordered contacts (from Pinky Paradise - reviews will be forthcoming) and wigs, and I am currently still looking for a pair of high-waisted faux-leather shorts (not the easiest thing to find, mind you).

Updates will be coming...until I go into panic mode.

~Kathryn

Related Posts Plugin for WordPress, Blogger...