Showing posts with label body form. Show all posts

Monday, June 11, 2012

Insane Black Rock Shooter cosplay part 5: the breast plate tutorial

Hi guys!  Now that I have caught a mild cold from Stuart, I finally have some time to sit down and make another IBRS progress report (kinda late lol).  I think this would be useful for whoever is trying to make light-weight armors.

First, let's recap.  I have already shown you the fun foam pieces I made out of a modified shirt pattern I had:

in order to make them with a little bit of depth to look like the armor IBRS is wearing, I had to add more layers of foam.
This gives you an idea of how thick the breast plate is
Comparatively speaking, the armor I made was not nearly as thick as the figure's.  Next time, I would probably use something like a thick yoga mat to make the armors.

The foam I found in Scrap Exchange that I used for the middle section to add thickness to the armor.  I cut it according to the pattern I already made.

Hot glue the thicker foam onto the already existing fun foam layer

add tape to get rid of bumpy areas and glue another layer of fun foam on top of the grey foam.

This is what the back looked like, I used some masking tape to hold the layers while the glue was drying.  I have not found anything better than hot glue yet to stick foam together.

Smoothing out the gaps by filling it with hot glue and scrape the surface with a piece of card

details on the filled gap

then mod podge the surface to prep it for contact paper

I also taped the edges with black electric tape to hide the grey foam.  I think model magic would work as well and make less creases, but I didn't have any at that moment.

with the contact paper glued on.  Contact paper sticks really well to craft foam once you mod podge it.  However, it becomes extremely unforgiving with mistakes.  Make sure you have a card ready to squeeze out those bubbles.

pieces of the back armor, I made this a little thinner because it would bend more easily for a better fit that way.

mod podge

with electric tape and contact paper.

The basic breast plate is finished.
The sides are held together with elastic and Velcro.  Do buy the industrial grade Velcro, because the regular ones just won't be sticky enough to hold the armors together.

After few adjustments, I added more details to the breast plate and voila!  Oh also, since craft foam can kind of hold a shape after it is been heated, I recommend heating it and bending it before you apply mod podge and contact paper.  They will become rather...burnt.
This displays all of the armor pieces I made for the cosplay.  I did acquire some thicker craft foam from Michael's later on that I used for some of the leg armors.  Other than that, the shoulder piece and some of the arm pieces are all thickened with the method described above.  I wanted to show you guys the details for my other armor pieces, however, I was too busy to take photos and this is the only one I have now.  Q_Q

Anyhow, let me know if you have any questions!!!

btw, I'm doing this Otaku House contest right now for this costume, please vote for me!!!  Thank you!

- Mimi -

Insane Black Rock Shooter Cosplay Progress:
Part 1 | Part 2 | Part 3 | Part 4

Wednesday, March 7, 2012

Insane Black Rock Shooter: Progress 2

So here is a quick update on my costume~ :D
You will see that I'm super ADD when it comes to making costumes and I like to work on everything at once...without finishing anything >.>

Anyhow, first up are the shoes!  Shape-wise, I have pretty much finished the very bottom part of the boots, the wings need to be reinforced and the entire thing needs to be either painted or covered with vinyl (have to decide what to do...)
I have also made one piece of the knee part, it needs a lot of calculations that I have no patience for right now.

Second, the bodice of my armor~  Since Stuey made that body form for me, I really wanted to test it out.  I dug out some old patterns and made a preliminary shape for the bodice armor.  It will become thicker eventually.
Front view
Side View
Back View
The taped areas are places that I want to insert a buckle-type thing for so that I could  easily put on/remove the armor.  Now that the body form has been sitting for a while...it has gained a ton of fat rolls O.O;

Last but not least, the claws!  I have a pair of gloves that have a small hole on it.  My dad bought me some replacements for them, but I'm still rather attached.  It is made of really soft leather...anyways, the point is that I don't want to glue anything onto my gloves.  I made "knuckle rings" as claws to put on my fingers.  I haven't made the very bottom part of the gloves, which will cover up the flower motifs.
The big piece is velcroed at the palm area to hold it.  Anyways, I might glue the claw parts onto the gloves eventually...or not...we will see.

That's all!  Let me know if you have any questions!!
Mimi

Sunday, March 4, 2012

Cosplay Progress - Masks and Half-People

Getting stuff done feels good, and blogging about it feels even better, lol.  Recently I have been working on my Deus Ex Machina mask/headpiece. I have begun to collect pictures of the mask in its formation from start to beginning.  Hopefully I will be able to write a tutorial once I am finished, but for now, I will describe the process as it has been occurring.

The first step was to create a basic mask framework.  Mimi helped me shape thin strips of cardboard to my face shape and size. 

After this, the nose and chin components were built as guiding points and anchors from which to build more facial components.  Fun foam is our material of choice.

The next part is a little hard to describe, because at this point we basically just took fun foam scraps and glued them to places to help the mask take a little more form, in no specific order.  The goal for this transition was to create a little bit of "sunken-cheek" look and to connect the nose to the bottom half of the face.  This was done wonderfully with lots of help from Mimi. :D

If there's anything I have learned from Mimi in the crafting world (other than glue gun burns can hurt a lot), it's that I should think of this project as sculpting with small pieces of fun foam,and  that fun foam can be used for anything and everything.   At this point it looks like the mask could either belong to Deus, or the King of All Cosmos haha.   

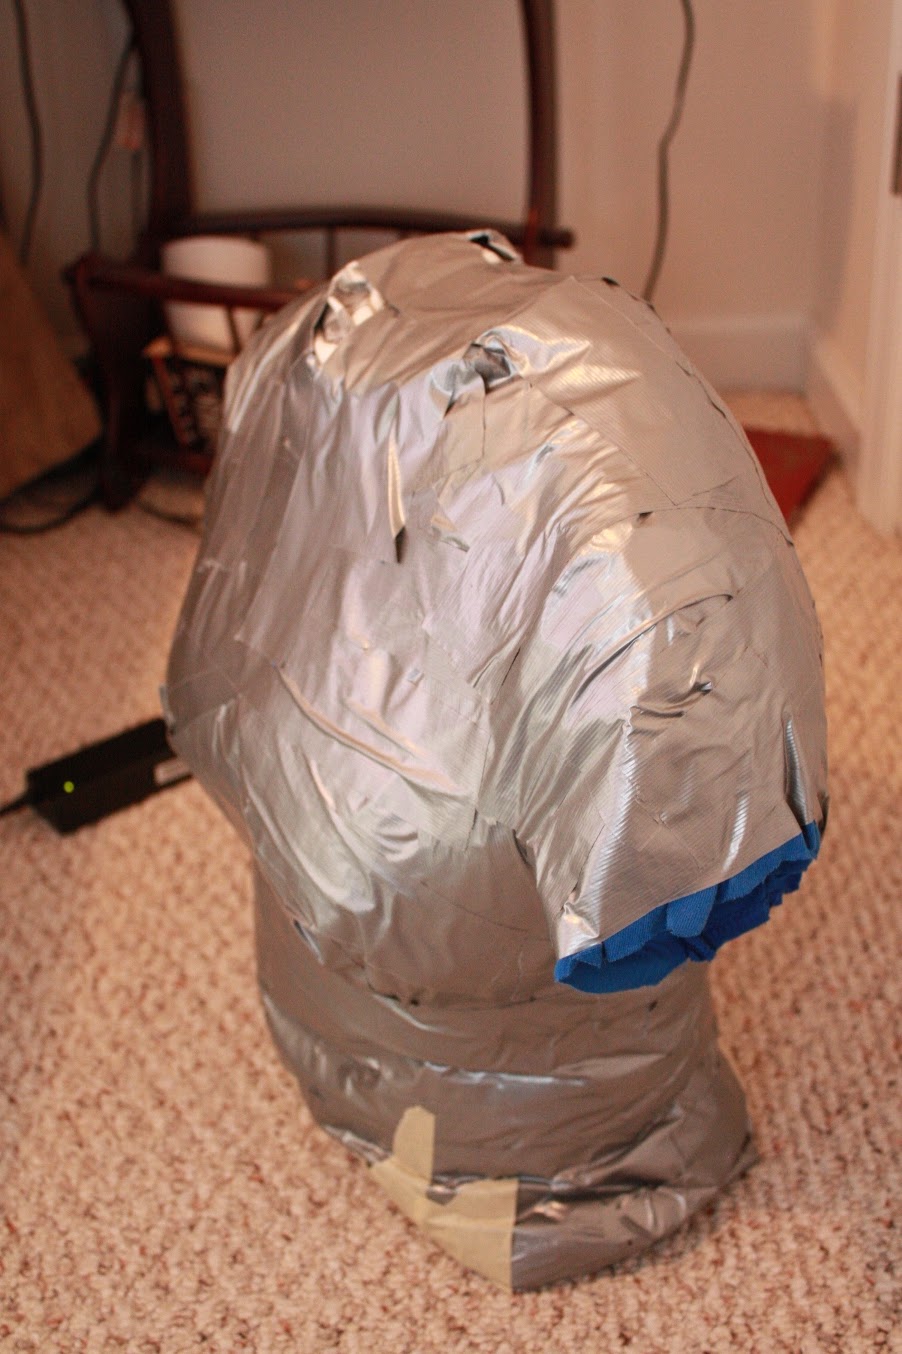
The other awesome thing we did recently is to create a body form for Mimi.  She was very patient as I duct taped around her for about an hour and a half.  We followed this tutorial from Threadbanger, but used regular duct tape instead of water-activated packing tape.  
Look, it's a ghetto Saber :P
After Mimi had a couple or so layers of tape on her, we cut through the shirt and tape body mold, re-taped it together, and stuffed it with some old shirts and pants of mine.  The final result? :

A wonderfully shaped figure that Mimi will be using for future sewing and armor-related endeavors.  I call it SeMimi, because it's more of a half  Mimi than a mini-Mimi.  Hehehe.

Well, that's all for now people.  We will be sure to keep you updated on anything cosplay related, or maybe just whatever tickles our fancy for the day.  Thanks!

-Stuart-

Related Posts Plugin for WordPress, Blogger...